Showing posts with label Heresy Snow. Show all posts

Tuesday, December 23, 2008

Product Drop: Limited Ed Colours, new prints

Ho, ho, ho! Like some sort of awesome Santa, we're dropping stuff all about the place.

Now, we were looking back at some of our early stuff, which really was pretty rubbish (we didn't realise it at the time, promise!). It's funny how you grow as a company, and many of those on our mailing list have watched this from the start (I see a few of them who have been with us since we started in May 2002).

But we're very stoked on our new stuff, we think it's getting better and better and the feedback we're getting from our sales crew and from emails seems to agree.

Anyway, here we go - most of our stuff will be running in predominantly unisex sizing - after speaking with our female crew, they tell us that girls stuff slightly loose is hot this summer - plus we think girls look crazy good in slightly loose tees and singlets - just ask the kids over at Hayley Mei.

First up we have Roots. This design, Heresy loves it. It's from one of our designers over at Messy Design. It really does speak to what we're all about, not just as snowboarders, but as humans. It symbolises the symbiotic relationship we have with everything around us. No Earth = no humans. We have to look after this planet, really we do. We've run this on unisex tees and singlets (down to small for ladies), and a girls-only cap tee.


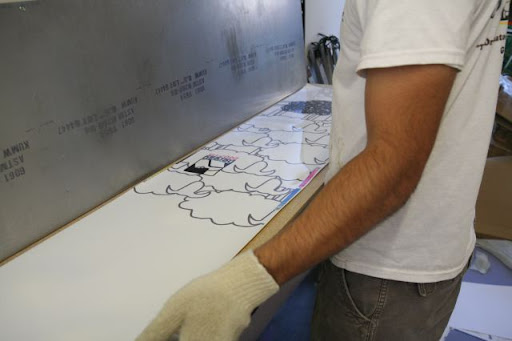
Next up we have Shark/Amaze. As previously posted about shark finning
, we think it's very lame - in fact it's fricking shaky what goes on - so we want to help stop it. This beautiful artwork from Messy Design once again (love you long time Jase) is designed to make people look twice. Maybe you can explain why shark finning is so wrong (you know, sharks being finned and thrown back to drown or be fed on alive ... that old chestnut).


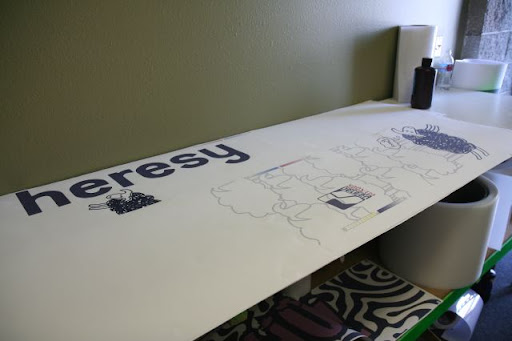
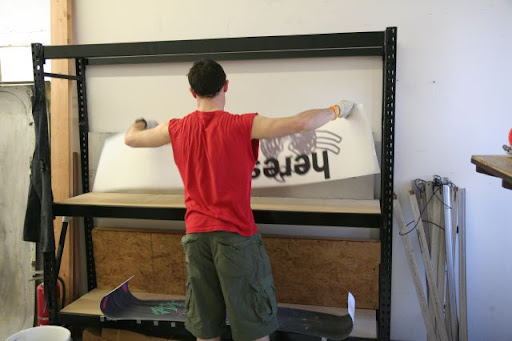
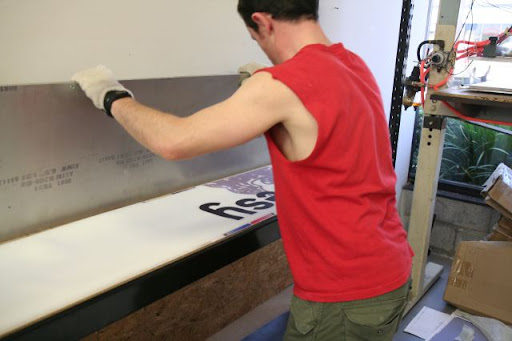
Next we have Snowboarder. I like this one because the message is simple but the implementation requires you to look twice and decipher it...."WHAT does that SAY?". It's pretty strong too, "I'm a snowboarder." Says a lot by not saying much. We're going to run this on some other stuff too, but we wanted some bright stuff now for the southern hemi summer and bright for the northern winter to cheer you all up. We printed this low as it's a bit different and keeps the chest pretty clean. The stripey singlets we did this on look rad - we will post some photos in the next few days.

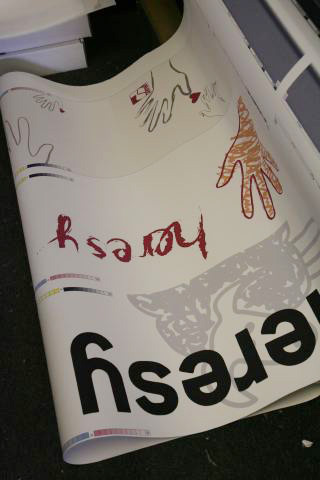
Below we have 'Heresy, J'adore' - thanks to Kat for this art. This is for girls only. We love it.


Keep an eye out on the store for these soon.

-tim|heresy

Monday, November 3, 2008

Australian Ski Fields under threat

Now, I don't know about you guys, but this report from theage.com.au is frightening.

No Australian ski season by 2100.

"So what, Heresy Dude. That's 92 years." Or, "So what, that's just Australia."

Let's take a step back here. Firstly, this doesn't just affect the Australian snow season. The global environment is a closed system with a lot of positive feedback that doesn't respect borders.

Down here in Australia, we're pretty marginal already given the nature of our precipitation events, the temperature of precipitation and our generally low alpine elevations. We're not the only ones though. Switzerland, Austria, Germany and others are next in the gun barrel. I don't know about you, but I want to see my kids skiing and boarding and experiencing the miracle of snow-sliding.

I'm seeing more and more daily reports of this nature.

Ok, some think this is rubbish. It's a conspiracy. Or, just a natural warming period.
More and more organisations - industry and NGO and GO (NASA for instance) alike - say we're having a devastating effect.

I have two issues with the conspiracy/skeptic theory.

1. What if that theory is wrong? What if human-induced warming is a reality, and we do nothing? I'd much rather do something and be wrong. What's the worst that can happen then? Investment in solar, geo-thermal, clean nuclear. New jobs. Less carbon-pollution. Less cars on road. More trees planted to offset carbon from flights whilst chasing the snow. Hmmm, doesn't seem so bad.

2. See the graph below [1] - you can see clear increases in temperature, with accelerated gradients as we industrialise (I mean, REALLY industrialise). Seems pretty clear-cut to us at Heresy. C02 levels have a lag in the environment, meaning


Now, with all this, it's really easy to feel helpless, however, grassroots programs and support for change is growing. You've got Protect Our Winters, 1% For the Planet concentrating on snow, and many, many others, driving grassroots awareness of this issue. Here at Heresy, we've joined 1% For the Planet and continue to put our money where our mouth is (we're at 4% of sales to 1% FTP program so far) on this issue.

So. Where do you stand? What will you do.

Money where our mouth is: that's how we roll.

[1] Giss, NASA - http://data.giss.nasa.gov/gistemp/graphs/

Wednesday, October 8, 2008

How to Make a Snowboard - Part 3

How to Make a Snowboard - Part 3
This is part 3 in our series showing how to make a snowboard from start to finish.

In Part 1 we learned about the printing of the base and topsheet graphic and the transfer onto the actual base and topsheet material.

In Part 2 we cut the base in preparation for the next steps - attaching the rails (step 4) and cutting the core and attaching the sidewalls (step 5).

Now we're ready to attach the rails to the base and get the core ready.

Step 4: Attaching the rails
The rails are shaped and formed according to the shape of the board we are making. It is therefore possible to have many different rail shapes in the factory, but sometimes we can re-shape one shape to fit another mold.

Below we can see some rails hanging up in preparation for use.

As our boards are handmade, great attention to detail is paid to ensure the highest quality boards. Attaching the rail is a crucial part of the process, where we need to ensure the rail is as flush as possible to the edge of the base material (Sintered 7500 for 2008). The edges are Rockwell 48 steel. Basically, we attach them flush to the base, using small amounts of an adhesive to hold it in place in preparation for the press.


Below we can see an almost-complete base, ready for layup.


Step 5: Prepping the Core
In this step we take our milled core, which is made specifically for a board length and shape, and is a full wood core. We attach our sidewalls (more timber, MUCH better memory and flex characteristics than ABS sidewalls, and significantly lighter) and extend the tips, recycling some offcut base material.

In the step below, the sidewalls are being glued on.

Here, the tip fill is attached.

And here we can see Tim and Sean have had some Dr Pepper and gone sugar crazy by personalising this board. This board ending going up to someone in Western Australia. This is how personalised we get with the boards. We really care about the little things.


In Part 4, we will be checking out the fibreglass prep and the layup process, so stay tuned. In the meantime, you can check the boards out at our online store, where they will be on sale very shortly (we're about to announce a special sale).

Wednesday, September 24, 2008

How to Make a Snowboard - Part 2


How to Make a Snowboard - Part 2
This is part 2 in our series showing how to make a snowboard from start to finish.

So, we have printed and created our base and topsheet, and cured them, in Part 1, and now we are ready to cut our bases in order to lay them up with rails.

Step 3: Cutting Base
Here you can see the cured base is layed up on the shape of the board. This shape matches the mold template outline.

The base + jig/guide are placed in a cutting bay, and secured in place. We use a router to cut the shape.
Before commencing cutting this, we would do well to remember to have a sip of Dr Pepper.


Here we can see we have nearly finished.

How to Make a Snowboard - Part 1

How to Make a Snowboard - Part 1

We've promised we'd put up a tour of our factory showing how our boards are made for some time, so, here it is; enjoy! We'll bring this to you over about 8 parts. We include the whole process include how to prepare the snowboard print, prepare the core, shape the snowboard, press, and finally finish the board including shaping the sidewalls and grinding the base.

In these photos you will see yours truly in red, and my man Sean in white. He's super-radical and I took him to Rock the Bells 2007 where we saw Rage Against the Machine, Wu Tang, Public Enemy, Mos Def and Cypress Hill amongst others. He was shocked.

So, here we go, Part 1: Print of, & Base/Topsheet creation.

Step 1: Base and Topsheet Print
In this step, we are printing the transfer for the base and topsheet graphic. This is printed on a large form factor printer in CMYK. Although the colours don't look rich upon exit from printer, this is not a cause for concern; the colours take a deep hue on transfer. To get to this point, we have designed the artwork in Adobe Illustrator (or Photoshop, or even something like Corel), to produce a file for the printer.


The finished topsheet print and base print.

That was easy eh? We now move on to the fun parts. At this point, I like to have a sip on my delicious Doctor Pepper beverage and sigh in excitement. "Why?" you ask? Because making snowboards is ace.

Step 2: Prepping, Printing and Curing the base and topsheet
After sipping from my crazy-ounced Dr Pepper, we begin prepping the topsheets and bases. Let's shorten base and topsheet to B&T which sounds suspiciously delicious (perhaps Bacon and Tomatoe, sandwich, but is really beetroot and tomatoe as I don't dig on pig so much).

Here we go laying out a length of the ISO topsheet.

Cutting, cutting.

Here, we have printed the base. Our boards use a combination of sublimation-only and sub+diecut. We have not shown the diecut process here, but basically we print the base in the same manner, but using a die, cut the shape out and replace it with an equivalent shape from a different colour - go and check out our boards to see the effect.

Here, we can see the base, laid flat, and the metal plate is a thick aluminium plate to help the base cool uniformly and in a flat manner. This helps prevent uneven cooling and thus a change in the integrity of the material.

Below we can see a printed topsheet; the sheet now has excellent saturation.

After the topsheet or base has cooled for the requisite time, we transfer it into this hi-tech holder!

So there you go, so far, we have:
-printed the base and topsheet, and
-transferred them to the topsheet and base material (ISO 7500)

Next? Next we show how the bases are cut in preparation for layup on the mold and rail attachment.

Next >> Part 2 - Cutting the Base